Create animated gifs using Camtasia
I love gifs!
I used to create them in the 90s when I was learning how to build my early websites. It was probably mostly the animated "under construction" gif. They went out of fashion in the late 90s due to better file formats and a patent on the gif format. When Slack was launched in 2013, and other messaging apps became commonplace, they made a reappearance as an animated response to messages. I think I probably send at least 10 gifs a day but I'd only made a few of my own. As I use Camtasia for my own videos on YouTube, let's look at how we can make our own using that.
Oh and of course, I pronounce it "gif" with a hard G like "gift". That's the correct way right? 😉
Getting started
To start off you need to record some video footage. This can be a video of yourself, your family, or some other fun situation.
You can record this easily using your mobile phone and then upload it to your computer. If you have a webcam, you can also record it straight into Camtasia instead.
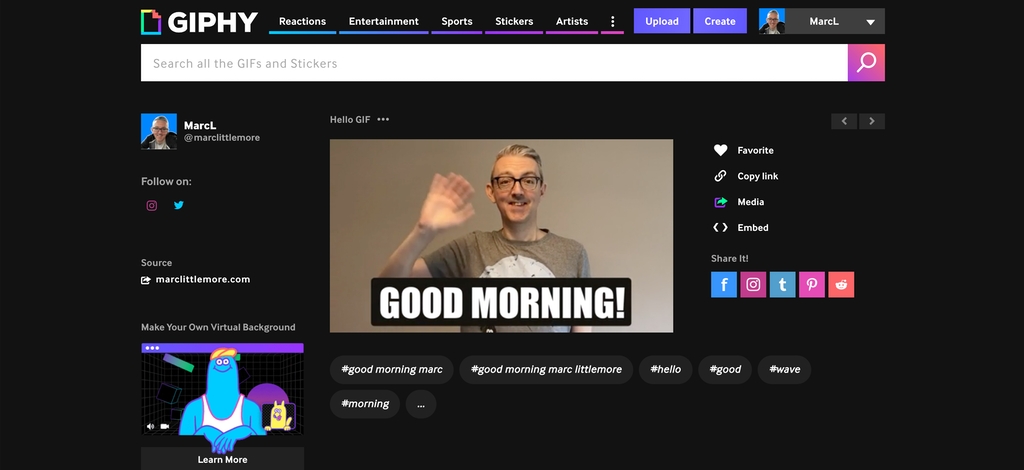
A basic Camtasia gif project
The main thing to remember with a gif is that it needs to be small. You're not looking for ultra-HD footage here. If you're planning on uploading the gif to a site like Giphy or Tenor then, although they support 720p images, its best to stick to a 480p resolution of 852 x 480 pixels.
Set up the project in Camtasia by clicking on Edit > Project Settings and set the resolution to a width of 852 and height of 480 pixels. Leave the frame rate as 30 fps.
Drag the footage that you've created already into the Camtasia Media Bin. If you're recording footage in Camtasia, ensure your webcam is enabled and record your footage directly into the application instead.

Next, drag the video you've added or created onto the timeline. You'll probably have recorded more footage than you need so use Camtasia's trimming tools to resize it to only the footage you need. Ideally this will be under 6 seconds long. For my gif, this was around 2 seconds long.
A gif needs to be short and sweet.
Add text
If you want to add some text to your gif, you can do this by using Camtasia's annotations tools in the left menu bar. Choose the annotation type that you'd like and drag it to the timeline. Make sure that you place it above the video on the timeline so that you can see it overlaid on top of the video footage.
If you want to use the classic meme font, it's Impact.
Move the text to the correct place for your video footage as shown in the screenshot below.

For my footage, I added a behaviour to the text so that it grows into the screen. Drag the behaviour of your choice on top of the text to apply it.
Depending on the video footage colour, you might need to add an additional background shape behind the text. If you do, make sure it sits underneath the text but above the video in the Camtasia timeline.
You can add any additional transitions to the text that you want such as fade in or out.
Exporting
Now you've created your masterpiece, it's time to export it. If you're planning on uploading the gif to Giphy or Tenor, you can export the timeline as an MP4.
Choose Share > Local File from the menu and export it to the folder of your choice as an MP4.
Alternatively, if you want the gif file, choose the same Share > Local File option from the menu but change the output format to animated gif and hit export.

If you're exporting it as a gif file, it often has quite a large file size because we can't go lower than 30 frame per second for a Camtasia project. You can optimise the gif file using a tool like EZGif. Experiment with the different optimisation formats. I used the lossy gif encoder at 35% which had a good reduction in file size without making the gif look too bad.
Upload to Giphy or Tenor
Now you can upload it to the gif platform of your choice. I use Giphy a lot so I've created an account and channel there. Upload your MP4 or gif file to your channel. You can then add tags so that it's searchable via their search engine. This will make it appear in apps like Slack too. Make sure you add relevant tags to the gif. In Giphy you can add a maximum of 20 tags so make sure they count.
Animated gif best practices
Gifs are not high quality videos so think about the following for optimising them for the gif platforms.
- Try and make your gif short. Under 6 seconds is best.
- Make your source video resolution should be 720p max, but we recommend you keep it at 480p.
- Most gifs appear on a phone or in messaging apps like Slack or WhatsApp. You don't need huge files at high resolution.
- Try and keep the number of frames in the animation low. Try to keep it at 200 frames or less. At 30 frames per second, that's just over 6.5 seconds in length.
Enjoy and keep on creating great gifs!

I'm Marc Littlemore.
I’m an Engineering Manager at n8n who works with high performing development teams and loves to help to grow other software leaders and engineers.
Want to read more?

Automate Your Static Site Rebuilds with Netlify Scheduled Functions
Effortlessly automate regular website updates for your static site using Netlify scheduled functions. Set it and forget it - never worry about manual updates again!

Easily Create Gravatar Images With Eleventy
If you're moving your Wordpress site to Eleventy, you will want to convert your Gravatar images too. Find out how easy it is using an Eleventy shortcode.

Streamline Your Workflow: Automate GitLab Releases with Semantic-Release
Revolutionise your GitLab workflow with automated releases. Discover how to use semantic-release for seamless deployment.

You've got this: become a confident developer
If you're early in your software development career, you might not realise how good you are yet. Here are a few ideas to boost your confidence.